Visit QGIS and go to the download page. Preferably, choose the Online (OSGeo4W) installer.
To install the latest version (4.x), start the installation and choose Express Desktop Install. Choose LTR for version 3.x (available until autumn 2026).
Visit www.qgis.org for installation on other operating systems.
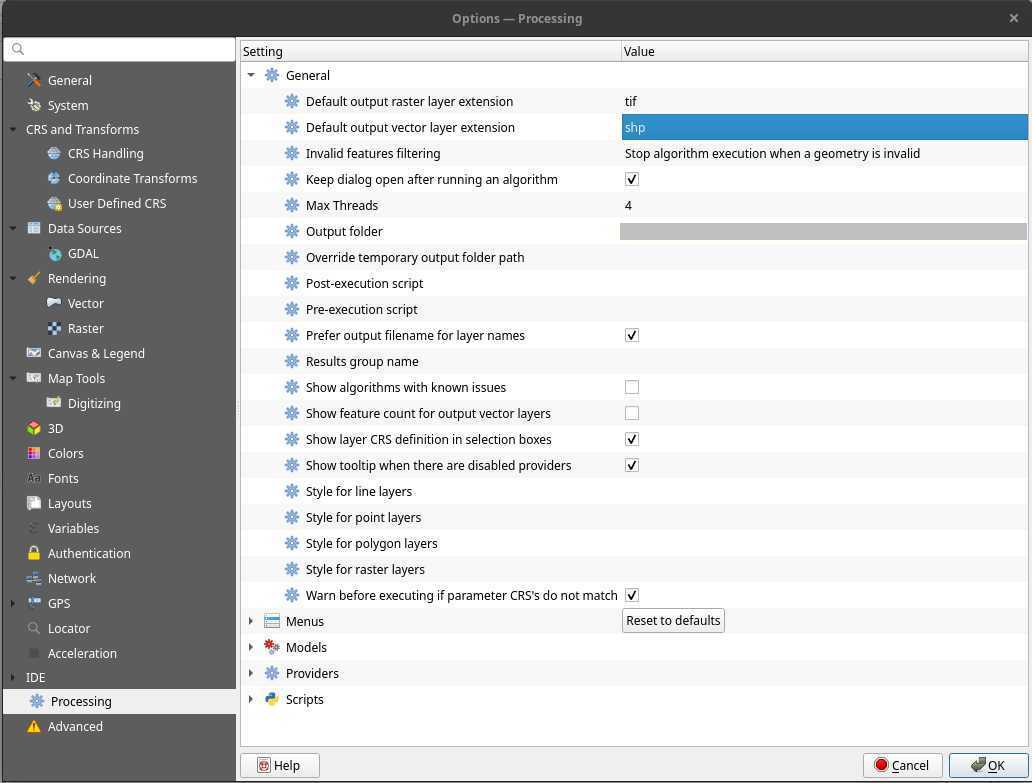
UMEP deals with raster and vector files but some file formats may not work. We strongly recommend using the following default formats: .tif for raster files and .shp or .gpkg for vector files. To set these values, Go to Settings -> Options. A window is opening, then you can set the default formats going to IDE -> Processing in the General section.
Fig. 2.1 Select .tif and .shp as default output file formats to avoid troubles using UMEP processing
Go to: Plugins -> Manage and Install Plugins… in QGIS Desktop.
Under the All-tab, Search for UMEP.
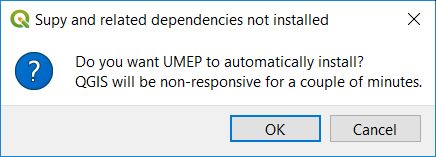
Click on UMEP and then click Install Plugin. We recommend you to click OK to the popup question below. That will save you troubles later on. The python libraries that will be installed (if not present on your system) can be found here (supy) and here (umep-reqs).
Fig. 2.2 When installing UMEP, related Python packages can be installed by clicking OK. Packages can also be installed later (see below).
As from Spring 2020 parts of UMEP is also available as a processing plugin. Install the same way but search for UMEP for processing. Some tools in UMEP for processing requires Java. If Java is not installed on your system (which will prompt an error message when installing the plugin), download the Java Oracle version or the Java JDK version and install the latest version (>= 11).
Test datasets and tutorials are available to try some of the tools out. Since QGIS is a multi-platform software system it works on other platforms as well. UMEP is constanlty under development so there may be missing documentation and instability. Please report any issues to the issue tracker. Also, have a look in FAQ for further installation tips and issues.
Go to: Plugins -> Manage and Install Plugins… in QGIS Desktop.
Search for UMEP.
Click on UMEP. If a new version is available, this will be stated here. If so, click Upgrade Plugin.
2.5. Adding missing Python libraries and other OSGeo functionalities
If a Python library for some reason is missing you can manually install libraries on your system. Below are instructions on how
to this for different operation systems. The same procedures can also be
used to obtain other tools and functionalities from the OSGeo
repository.
Operating System and Installation instructions:
Linux
Linux comes with its own Python installation which QGIS makes use of. This makes it possible to directly use pip (an installation tool of Python libraries) to add missing libraries. Simply open a terminal window and type sudo pip install pandas if you want to install this library. In order to install pip open a terminal and type: sudo easy_install pip. You might need to restart QGIS to get it to work.
Or refer to startup.py to modify start up file of QGIS by including the paths to pandas and scipy. An example of startup.py may look like:
As Windows has no Python installation included, QGIS make use of a separate Python installation added when QGIS was installed on your PC. There are two options available.
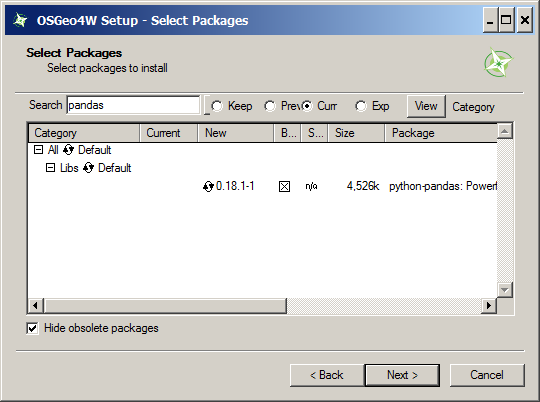
(Try this first) Run the osgeo4w-setup-x86_64.exe (or osgeo4w-setup-x86_32.exe depending on your system) executable. This can be found using the Windows search bar. Select Advanced Install -> Install from Internet. The next four pages will give options to select the Installation Directory, Local Package Directory, Connection Type and Download Site. Alter these as required. In most cases the default entries will be fine. When you come up to the Select Packages page, search for the requied package (e.g. pandas) and click on Skip until you see a version number of pandas (see image below). Finish the installation.
Fig. 2.3 Example of installation of pandas using the Installation (64-bit) For Advanced Users
IMPORTANT: on Windows, scipy needs to be installed via this option to include the correct dependencies.
pip is a command to install python packages but pip cannot be used directly from a common command line window (cmd.exe). However, if you installed QGIS according to the recommendations in Getting started you should have a OSGeo4W shell installed where you can use pip to add desired Python libraries. OSGeo4W shell is found in the Windows start menu. To use it with QGIS3 versions before 3.20, type py3_env the first thing you do after you have open OSGeo4W shell.
You need to run the shell as an administrator of your PC. To do this, right-click on OSGeo4W shell and choose run as administrator. To install e.g. the urban weather generator (uwg), write the command below in the command window that has appeared (QGIS < 3.20):
py3_envpython-mpipinstalluwg
As from QGIS version 3.20 there is no python 2.x availalbe. Hence, the command py3_env is not needed. If necessary, you can also install other versions of python libraries using pip
pipuninstallnetCDF4pipinstallnetCDF4==1.5.1
to upgade a library:
pipinstallnetCDF4--upgrade
Mac OS X
You could try to follow the instructions for Linux. Note: this approach is tested to be working under Mac OS X 10.11.5.
Otherwise, a nice description on how to install packages is posted here.
Other Platforms
Other platforms require the packages to be installed to the QGIS Python path, which differs depending on operating system.
Or refer to startup.py
to modify start up file of QGIS by including the paths to pandas and scipy. An example of startup.py may look like
2.6. Installing development release (could be unstable)
Download the code as a zip file:
UMEP: from the repository, click on the green button Code -> Download ZIP. Note that the main branch since april 2026 is master.
UMEP-Processing (processing toolbox): from the repository, click on the green button Code -> Download ZIP. Note that the main branch at the moment is main.
If you have an installed version of UMEP in your QGIS, uninstall it by going to “Plugins -> Manage and Install Plugins -> Installed -> UMEP” and click Uninstall plugin.
Go to “Plugins -> Manage and Install Plugins -> Install from zip”.
Restart QGIS. The UMEP plugin should be visible in the QGIS toolbar. If not, go to “Plugins -> Manage and Install Plugins -> All” and search for UMEP. Make sure that you also tick in the box Show also experimental plugins in the “Settings”-tab.